
Flower Forest Level 9 - Connect the Light Path Tiles
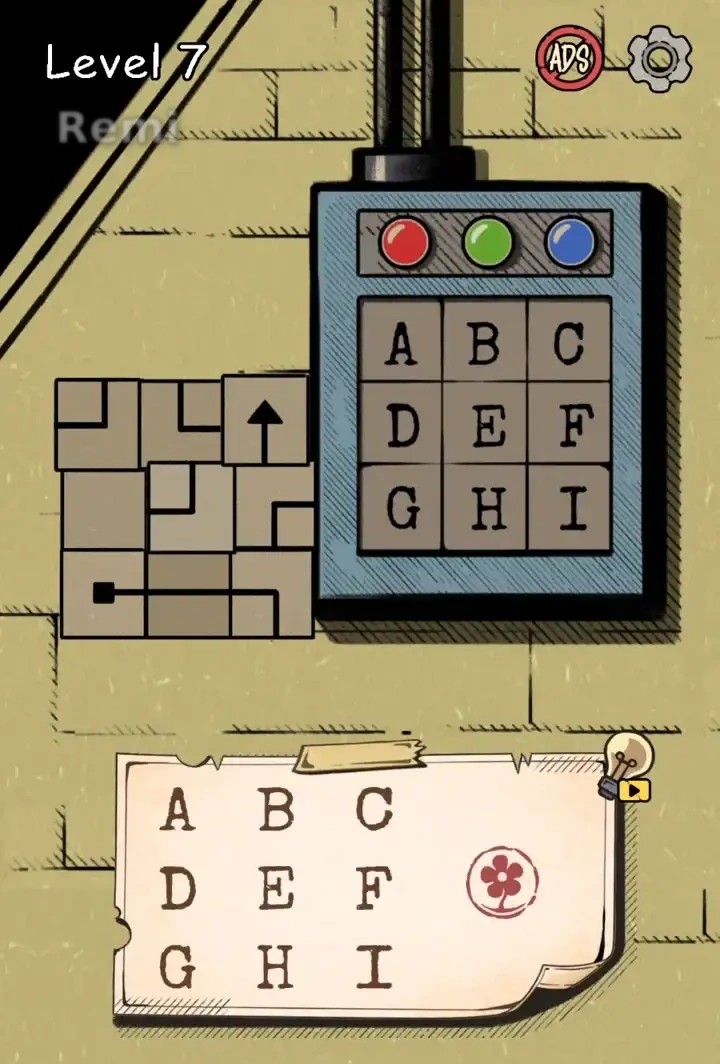
How to Beat Level 9 Flower Forest
- 1Drag each of the movable light path tiles on the left one at a time, so the black line runs continuously from the black start tile up to the top arrow.
- 2The line must not break or split in the wrong direction, so keep adjusting the position of each tile until the run is clean.
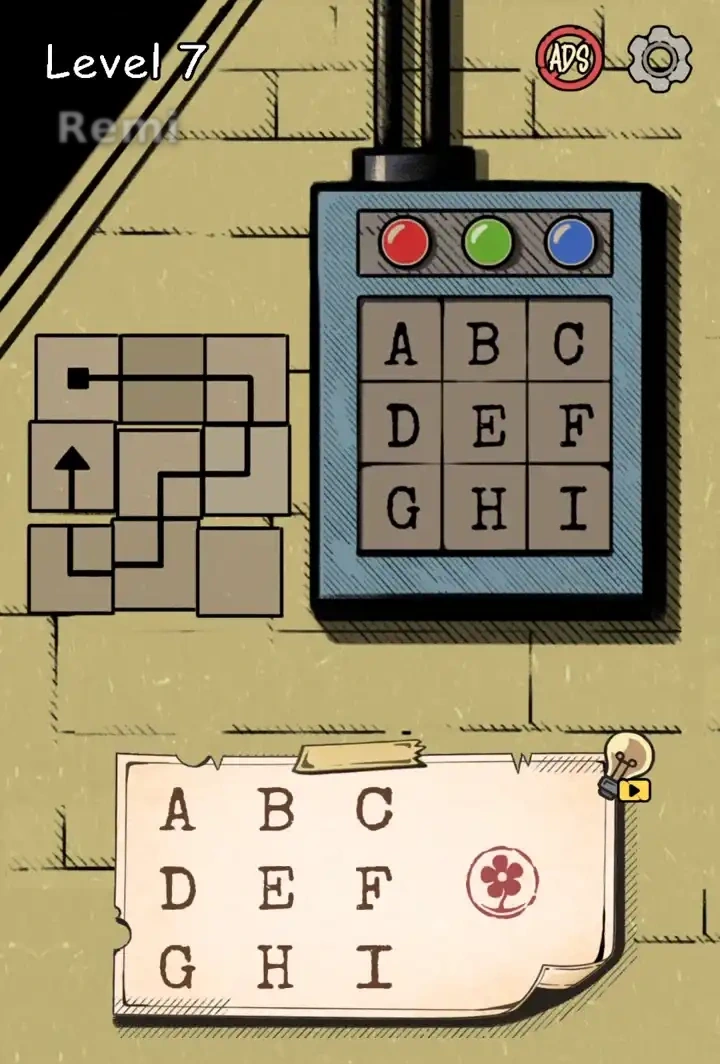
- 3Once the line is whole, map the cells it passes through onto the three-by-three letter grid on the right.
- 4Tap A, B, C, F, E, and H in that order, leaving D, G, and I untouched, then press the flower button to submit.
Level 9 Flower Forest - Final Answer
How to read the answer: In the answer scene the black line on the left has been joined into a continuous path from the start to the arrow. Map each cell it crosses to the three-by-three letter grid: the top row lines up with A, B, and C; the path then passes through the right-middle cell F, returns to the center E, and finishes at the bottom-middle cell H, while the left-middle D, bottom-left G, and bottom-right I are not on the path. Reading the path from start to arrow gives A, B, C, F, E, H.
Flower Forest Level 9 - Connect the Light Path Tiles
Flower Forest - Word Puzzle splits the ninth walkthrough into a left half and a right half: a set of movable light path tiles on the left, and an A to I grid switch on the right. The starting frame leaves the path tiles scattered, and the black line has not yet formed a complete run. The answer frame freezes the moment the tiles are in place and the black line runs continuously from the start to the top arrow.
This is a path-and-letter combination. You first connect the path on the left, then translate the cells it passes through into letters on the A to I grid, tapping them in the right order and leaving the three off-path letters alone.
Level 9 Flower Forest Key Takeaways
- Connect the path before reading any letter: until the path forms a single clean line, the grid order cannot be worked out. Start by arranging the light tiles on the left into a continuous run from the start tile to the top arrow.
- Watch for breaks and unwanted branches: once connected, walk the path end to end and confirm there are no broken cells or extra branches, or the mapping onto the grid will be off.
- Tap in the A → B → C → F → E → H order: the path crosses the top row, then the right-middle F, returns to the center E, and ends at the bottom-middle H, and the row only accepts that sequence.
- Press the flower button to submit: once A, B, C, F, E, and H are gone and D, G, and I remain in the row, press the flower button at the bottom to lock in the answer.
Share this guide